Another hike
Our next hike adventure was to be the mountain called Kjerag, just south of Lysebotn.
Kjerag is home to another of Rogaland county´s main attractions – the famous Kjeragbolten boulder.
Initially we had plans on doing the Trolltunga hike as well, but we decided it was a no-go this time.
The five hour drive north from Stavanger to Trolltunga, combined with a 10 hour trek, was pushing it a bit too far when travelling with a two year old first-timer mountaineer.
And, as it turned out, the Kjeragbolten trek was tough enough.
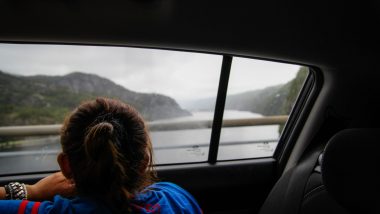
Curvy roads
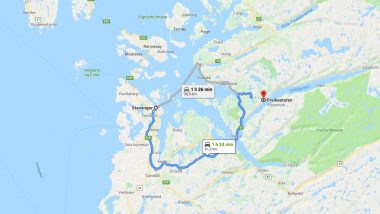
The road leading up to the starting point of the Kjeragbolten trek took a lot longer to drive than expected.
 Norwegian winding roads are slow and you have to take the Google Maps time predictions with a slight pinch of salt.
If you are not Norwegian that is.
Because if the road sign says 80 km/h, then they drive 80km/h, no matter what the road conditions are. (Maybe there is a reason why violating traffic rules costs a fortune in Norway.)
Sweden is faster
Many Norwegians actually choose to drive through Sweden if they are going far north or south.
The reason for this is probably (besides from the fact that the Norwegian roads takes far longer to drive) that a speeding ticket in Sweden is a lot cheaper than in Norway.
Even though the straight-line distance looks shorter when looking at a map, the Norwegian mountainous terrain often means slow, curvy roads and longer travel time.
The Swedish roads are far more direct and faster, meaning that you will eat up the extra miles very quickly.
Starting point
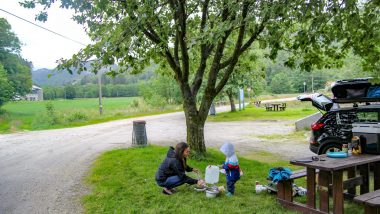
The Kjeragbolten route starts at the Øygardstøl parking lot.
Besides from this being a place to park your car (fee 200 NOK), there is also a panoramic restaurant and toilets here.
A big sign states that the trek back and forth should take 2,5 + 2,5 hours.
Remember, this is Norwegian speed. Allow at least 6-9 hours as this is quite a demanding little walk if you are not used of wandering in mountainous terrain.
The total distance is about 11-12 km (7 miles). This includes three steep ascents with an overall elevation of 600 meter (1970 ft).
Time to turn around?
We packed our things together and left the parking area. When we had walked the rocky path for about 200 meters we reached the first climb.
I immediately started to question my own judgement.
The incline did not look that bad from the parking lot. It was somewhat different this close to the hillside.
Suddenly there were guide chains in front of us, and the trail went pretty much straight up. Was this even doable?
We had a quick talk over and then decided to push on. Perhaps not the greatest way of showing good parental judgement, as Leo was hanging on my back in the child carrier.
Luckily we had good hiking boots, and the weather was nice and dry.
Unpredictable weather
That said, the mountains conditions can change in an instant, so be prepared.
Bring plenty of water and something to eat as there will be no place to buy such stuff along the way. And remember an extra change of clothes and a waterproof jacket.
A sunny sky and 20 degrees in the valley was therefore not a guarantee that the weather on top of the mountain would be the same. Quite the contrary, as we would later discover…
Not for everyone
In total there are three steep sections on the trek.
The first part is considered to be the most demanding one.
That does not by any means mean that the remaining walk is effortless.
Down is not always easier
So if you thought the initial climb through the first section of the trek was hard going uphill, well, downhill can be at least as tricky.
Steep gradients and wet, smooth rocks with loose gravel and mud is a recipe for an accident if you are not careful enough.
Another important part to take into account is the weather. If the conditions are wet, take it easy.
Compared to the Preikestolen-trek, where the steepest parts nowadays have stone staircases, the path up to Kjeragbolten is much more demanding.
Incredible scenery
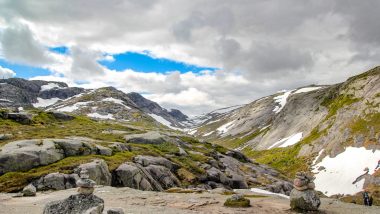
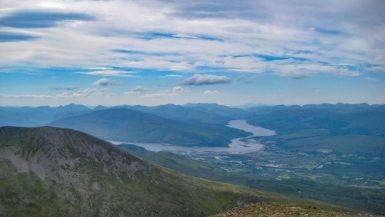
 The further up the trail we got, the more beautiful were the views.
The surrounding landscape is actually much more spectacular than the Kjerag boulder itself in my opinion.
When we had finished the third and last climb, up on the main plateau of the Kjerag mountain, we turned around.
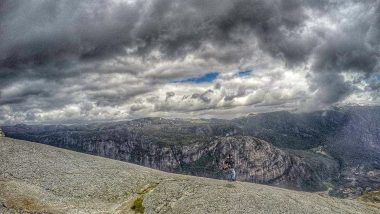
We looked back down on the fjord beneath us. Far below to our right was the tiny town of Lysebotn, beautifully framed by the nearby mountains.
Lost
 Our excitement grew the further up the mountain we came. The clouds and mist did the same.
The sun had by now dissapeared. On our right hand side a dark, grey sky started to form.
To help you not get lost, most of the route is clearly marked with stone piles which have big red T’s painted onto them.
Other trail markers and signs have also been put up along the way for further safety.
And there is a reason for all these signs. The often quick change of weather up in the mountains might get you both disoriented and lost.
In the space of about two minutes a thick fog rolled in over the top of the mountain. Suddenly it was all around us.
Where to go?
Engulfed in a thick layer of white we soon lost track of the path. It was impossible to see more than 10-15 meters (32-49 ft) ahead.
Considering that we were right up on the main plateau we had to slow down considerably and watch every step we took.
We knew our main objective was somewhere very close. The only question was, in what direction?
Not alone
 Some other disoriented tourists appeared in the distance. Together we tried to figure out which way to go.
It took us another 15 minutes or so until we finally found the right way.
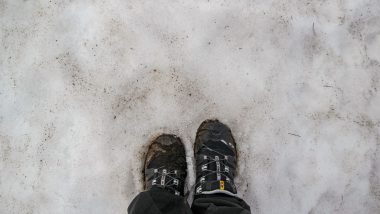
Soon after that we arrived to the narrow, snowy, passage that led down to the edge of the mountain.
And there it was!
The boulder of Kjerag. Wedged between two massive rock faces.
It did not look that impressive to be honest, as its background was completely covered in mist.
Second thoughts
Me and Leo went down to the short line of people standing on the left side of Kjeragbolten. They were all waiting for their turn to step out on this famous little boulder, squeezed in between two mountain cliffs.
For a very short moment I thought about taking a photo on the rock. (Without Leo on my back of course.)
When we got a bit closer that thought quickly changed.
The surface of the stone was wet, and it looked very damn slippery. Why in god’s name would anyone want to risk their, probably at least slightly, precious life for a photo on a stone looking like that?
IF you fall or slip, you will have a nice 984-meter (3,228 ft) free fall until you hit the bottom of the Lysefjord. Even without having a doctors degree, I believe it would be a fall to a certain death.
A tragedy waiting to happen
Surprisingly enough, Kjeragbolten has not had any recorded visitor related deaths so far. (Trying not to sound too much like an old overprotecting old fart here.)
If you are one of many that need to have that “standing-on-a-stone-crazy-cool-shot”- use extreme caution.
It is just a matter of time until the next Instagrammer falls to his/her death over a simple photo.
Nice shoes man
As the conditions looked like they were not about to change we decided to head back again. It was cold and we had been up there for an hour already.
While retracing our steps we met lots of other tourists on their way up. It was remarkable to see how ill-prepared some people were. Exactly like the day before when we hiked Preikestolen.
No backpack, just a t-shirt and walking in a pair of sandals. Some “hikers” are obviously more hardcore than others…
Two year old champ
 By now Leo had been strapped in the carrier for way too long.
Of course we should have stopped and let him stretch his legs more often, but we started to run out of snacks and food and wanted to get back to the car as soon as possible.
On one of the steepest passages with chains the poor little guy got a cramp in both his legs. It took a short while until we figured out why he was crying as his speech capabilities were a bit limited at the time.
Safe to say, we had a pretty guilty conscience the rest of the way down after that.
Fortunately the rest of the way was only a ten minute walk. Soon he was wobbling around on the parking lot with a happy face.
Five minutes after that he had ice-cream all over the same happy face and all the previous discomforts were long forgotten.
When to go?
Mid May – October. We did it in early July, and there was still a lot of snow remaining on the top.
How long did it take for us to complete the hike?
Well, Swedes are Norwegians closest relatives, thus we are almost equally fast. We made it in 4,5 hours…
What happened to the fantastic Scandinavian summer?
Who knows? The temperature and weather can vary quite a lot in July.
Even so, having an average temperature of about 14 °C was a bit baffling. (Our Malaysian little friend had an shockingly cold holiday experience.)
How much is camping in Norway?
Camping sites will charge around 200-250 NOK per night for a spot to put up your tent. Not that bad considering that the fee also gives you access to cooking facilities, toilets and showers.
If you go camping in the nature, the fee is free. All Nordic countries have a similar system when it comes to the “freedom to roam”. 
Be considerate, and keep at least 150 meters away from the nearest inhabited house or cabin. Then you can put up your tent pretty much anywhere you like.


